Safeguarding your ad inventory from invalid traffic (IVT) is paramount. The consequences of non-compliance with Google’s ad traffic policies can be detrimental to your revenue and reputation. This comprehensive guide will provide actionable steps to use our award-winning ad fraud solution, Traffic Cop, to block ads from serving to invalid traffic.
Step-by-Step Guide to blocking ads from serving to IVT
You will be provided with a new set of AdSense or Ad Exchange tags, which looks something like this:
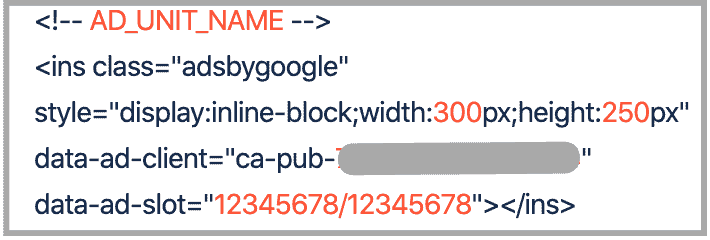
Your Google Ad Manager (GAM) tags will also be replaced with a new set of ad tags that looks something like this:


Check out PubGuru University to learn more about deploying ad tags and optimizing ads with AdSense, Google Ad Manager, and more!
AdSense/Ad Exchange Tags
-
- Remove any old hardcoded AdSense or Ad Exchange from the site
- If using WordPress, you can deploy the tags using any of these plugins:
Advanced Ads
Click Advanced Ads > Groups & Rotation > Add New Group
Give it a name & save it:

Edit the newly created group and, set to Ordered Ads & select the number of ads you want to display per page
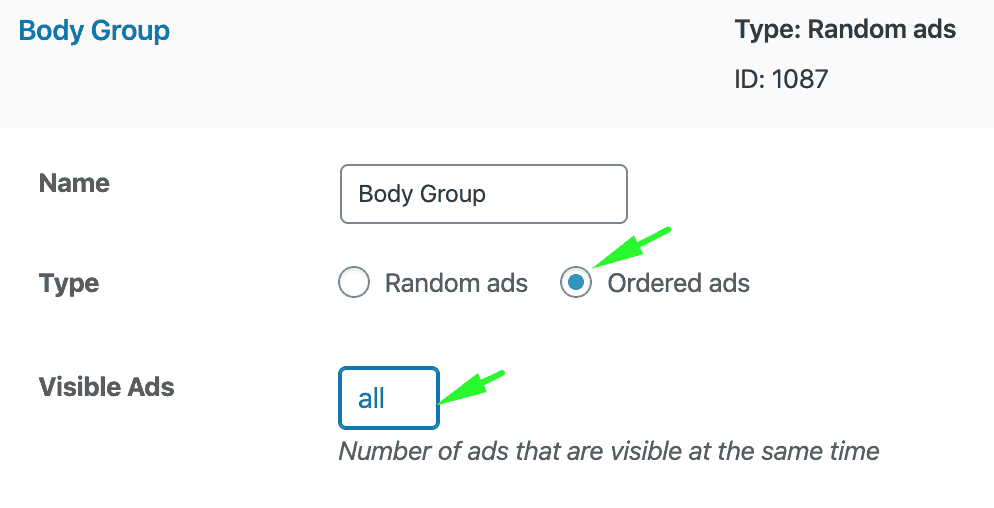
Click Update Groups
Click Advanced Ads > Ads > New Ad
Give it a title or name. Something that would allow you to identify this ad (e.g., ad_top_sidebar) easily
Ad type: Plain Text and Code
Paste the tag in the space provided under Ad Parameters

Set Display and Visitor conditions as needed
Select Group
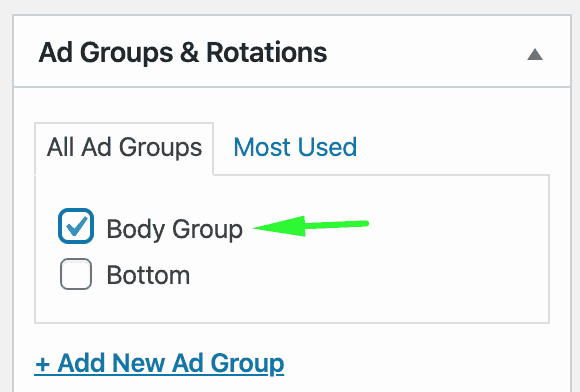
Click Publish
Select the placement or spot where you’d like it to show up

Repeat the steps for the next tag you need to deploy.
If the ad is intended for the sidebar, click Appearance > Widgets
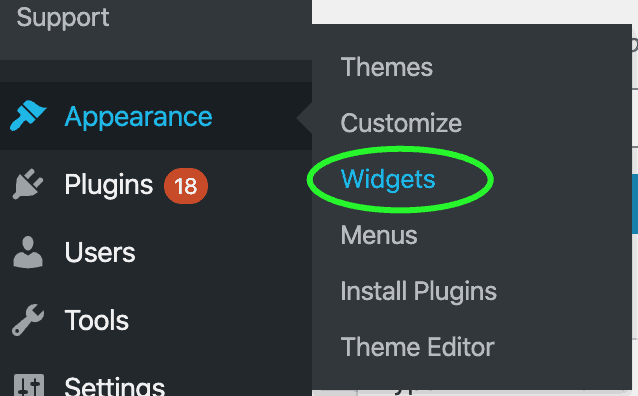
Drag Advanced Ads into position and select which ad you’d like to show on the spot selected, then click Save
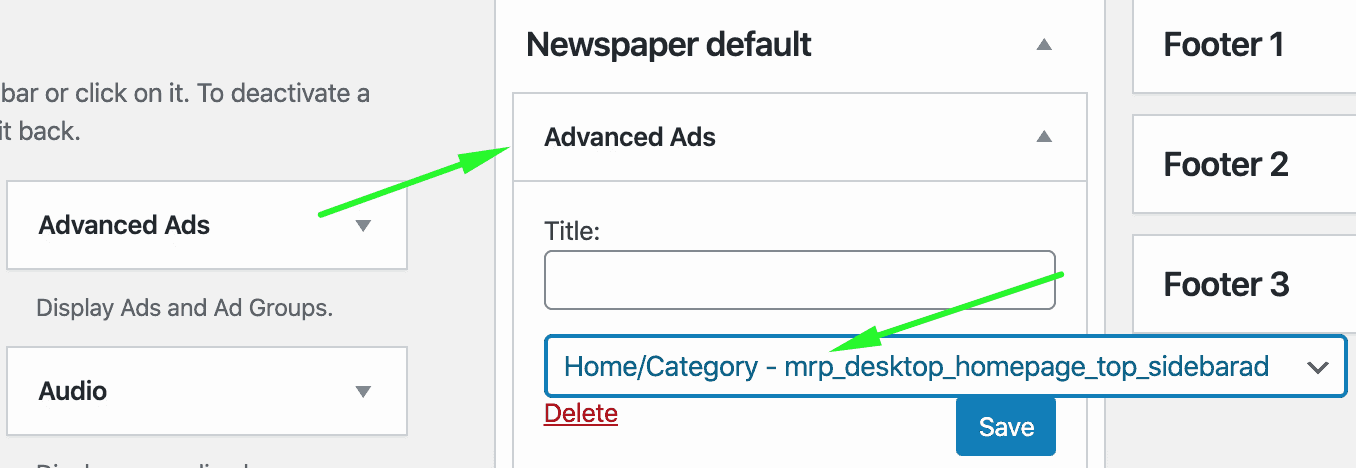
Watch this tutorial for more info:
Ad Inserter
Click Settings > Ad Inserter
Use a new ad block and paste the <body> tag provided to you.
Specify which page categories you’d like it to show up and which spot on the page
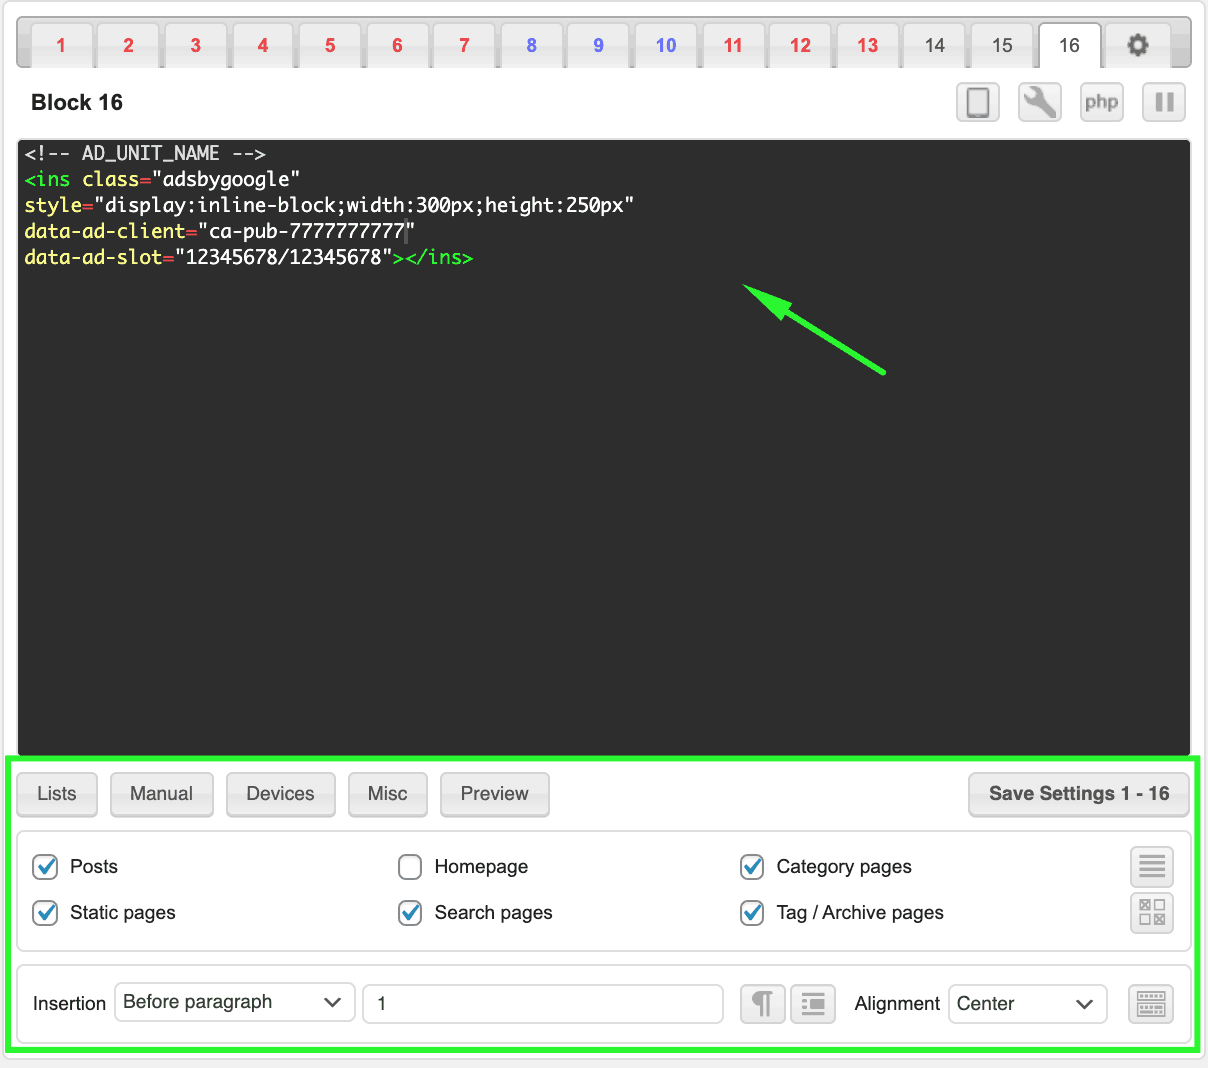
Repeat steps for the next <body> tag you need to deploy.
If the ad is intended for the sidebar, specify which page categories this ad will serve but keep Insertion: Disabled

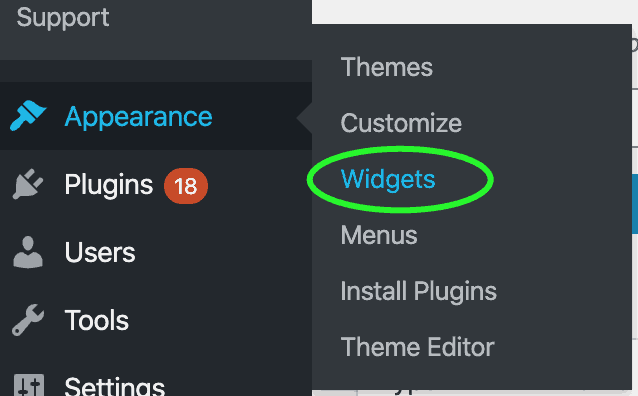
Then, go to Appearance > Widgets
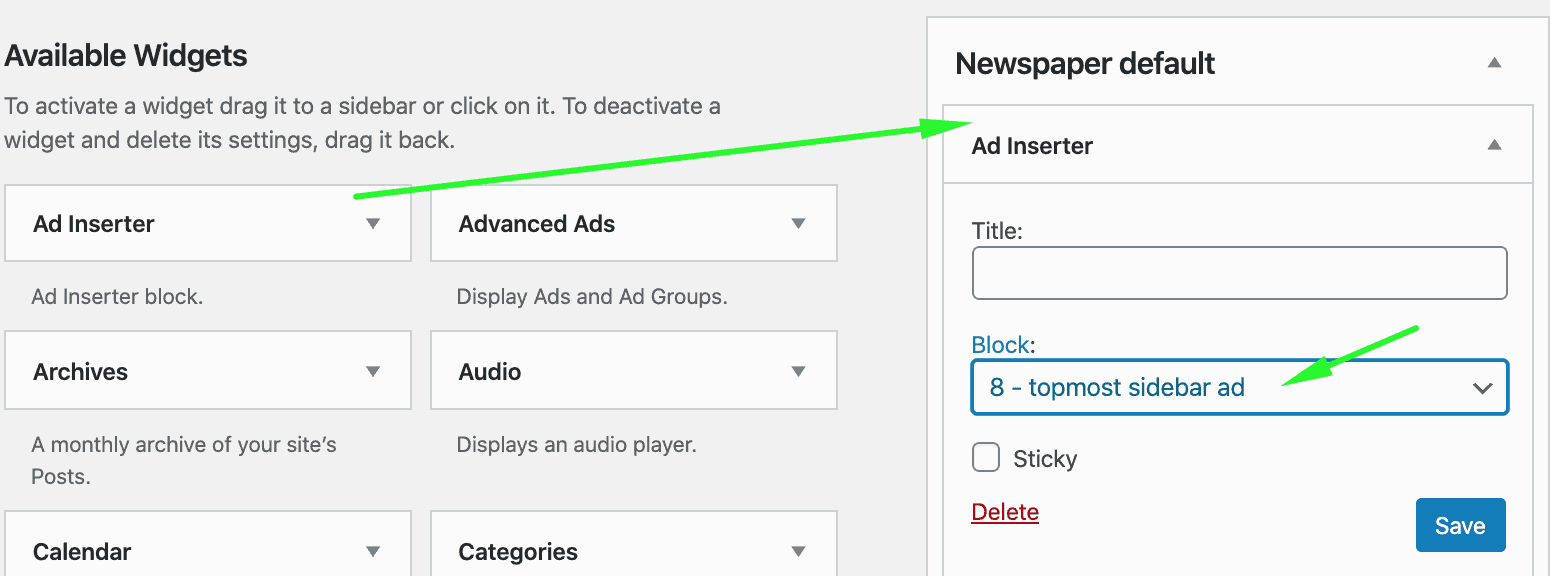
Drag Ad Inserter into position and select which block you’d like to show on the spot selected, then click Save
Google Ad Manager tags
-
- Remove any old Google Ad Manager tags deployed on the site, from both <head> & <body> sections.
- If using WordPress, you can deploy the new <head> tag using any of these plugins:
Advanced Ads
Click Advanced Ads > Ads > New Ad
Give it a title or name. Something that would allow you to easily identify this ad (e.g. Head – All Pages)
Ad type: Plain Text and Code
Paste the <head> code in the space provided under Ad Parameters

Set Display and Visitor conditions as needed
Click Publish
Select Head Placement:

In case you have separate Header tags for different sections of your site, follow this tutorial:
Ad Inserter
How to setup a test page:
Click Settings > Ad Inserter
Click (Ad Inserter General Settings)
Click the Header tab
Paste the <head> code in the space provided
Click to enable

Click Save Settings
In case you have separate Header tags for different sections of your site, check out the first tutorial above.
If using WordPress, you can deploy the <body> tags using a plugin as follows:
Advanced Ads
Click Advanced Ads > Groups & Rotation > Add New Group
Give it a name & Save:

Edit the newly created group and, set to Ordered Ads & select the number of ads you want to display per page.
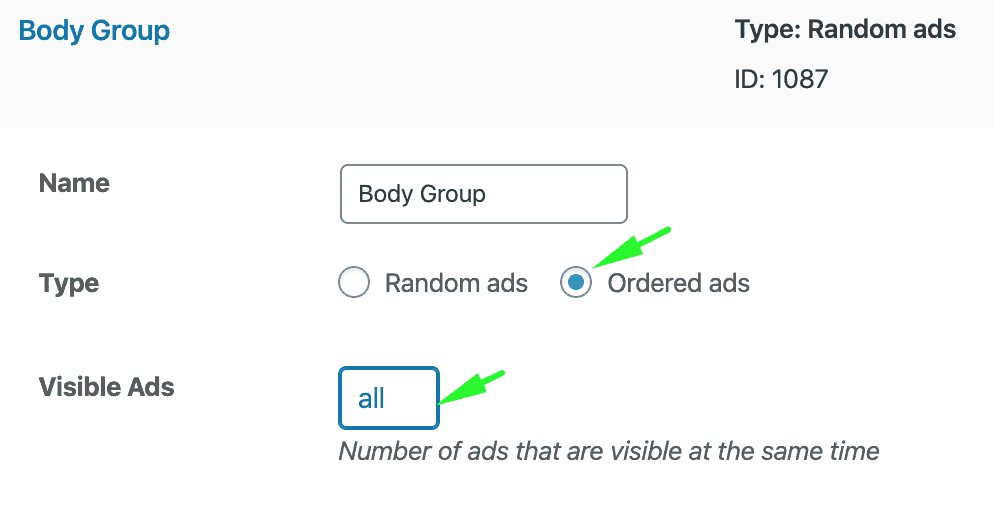
Click Update Groups
Click Advanced Ads > Ads > New Ad
Give it a title or name. Something that would allow you to identify this ad (e.g., ad_top_sidebar) easily
Ad type: Plain Text and Code
Paste the <body> tag in the space provided under Ad Parameters

Set Display and Visitor conditions as needed
Select Group

Click Publish
Select the placement or spot where you’d like it to show up

Repeat steps for the next <body> tag you need to deploy.
If the ad is intended for the sidebar, click Appearance > Widgets

Drag Advanced Ads into position and select which ad you’d like to show on the spot selected, then click Save
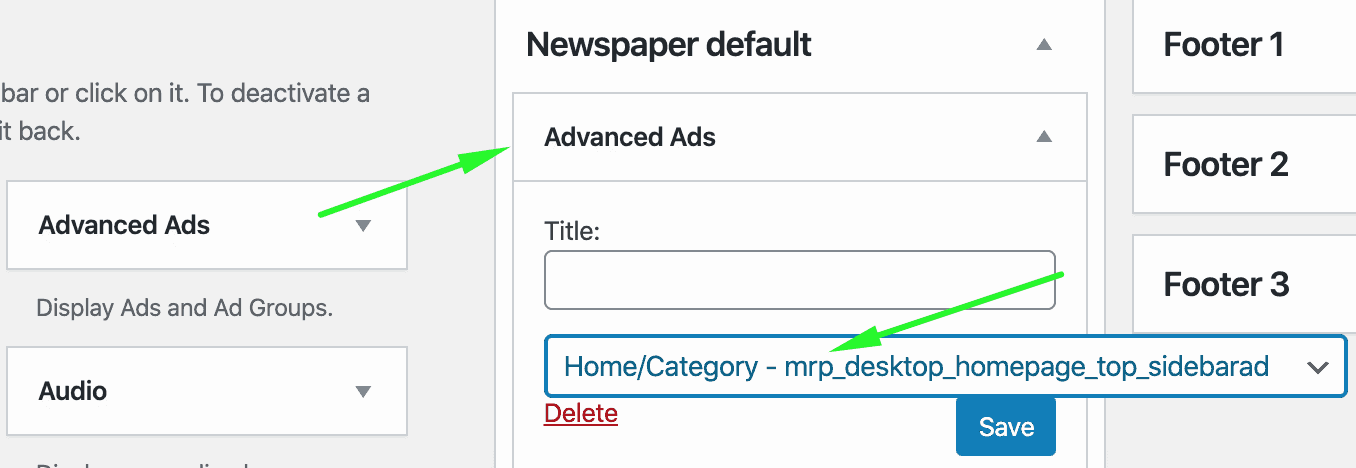
Watch this tutorial for more info:
Ad Inserter
Click Settings > Ad Inserter
Use a new ad block and paste the <body> tag provided to you.
Specify which page categories you’d like it to show up and which spot on the page
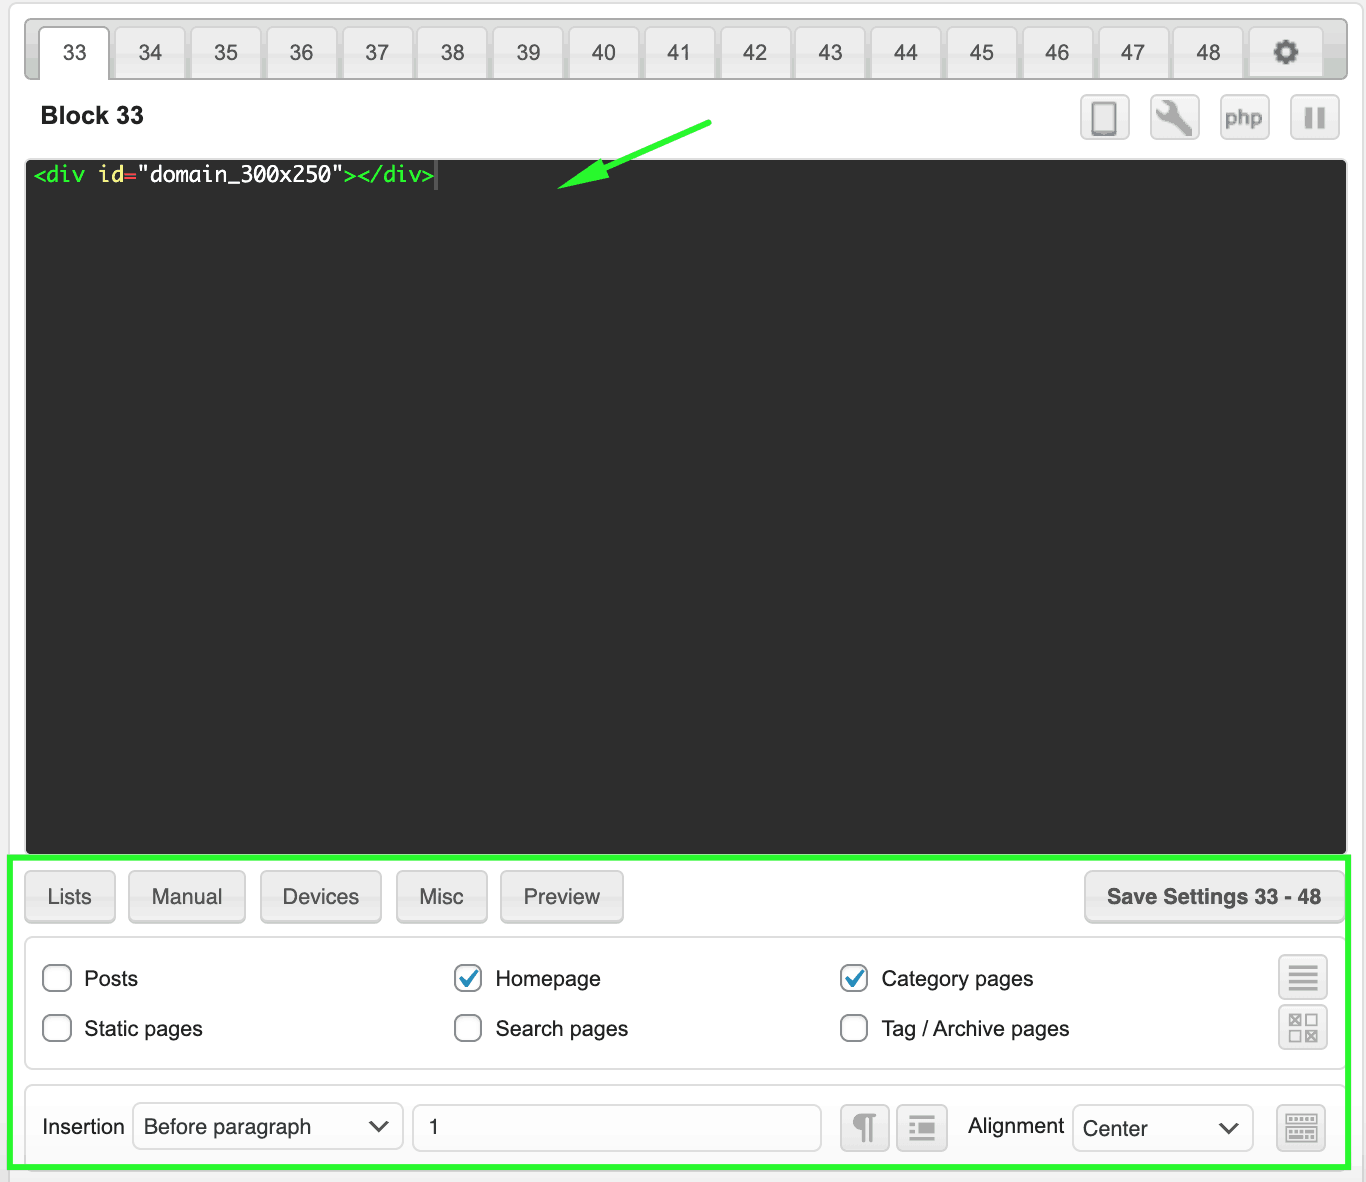
Repeat steps for the next <body> tag you need to deploy.
If the ad is intended for the sidebar, specify which page categories this ad will serve but keep Insertion: Disabled

Then, go to Appearance > Widgets

Drag Ad Inserter into position and select which Block you’d like to show on the spot selected, then click Save
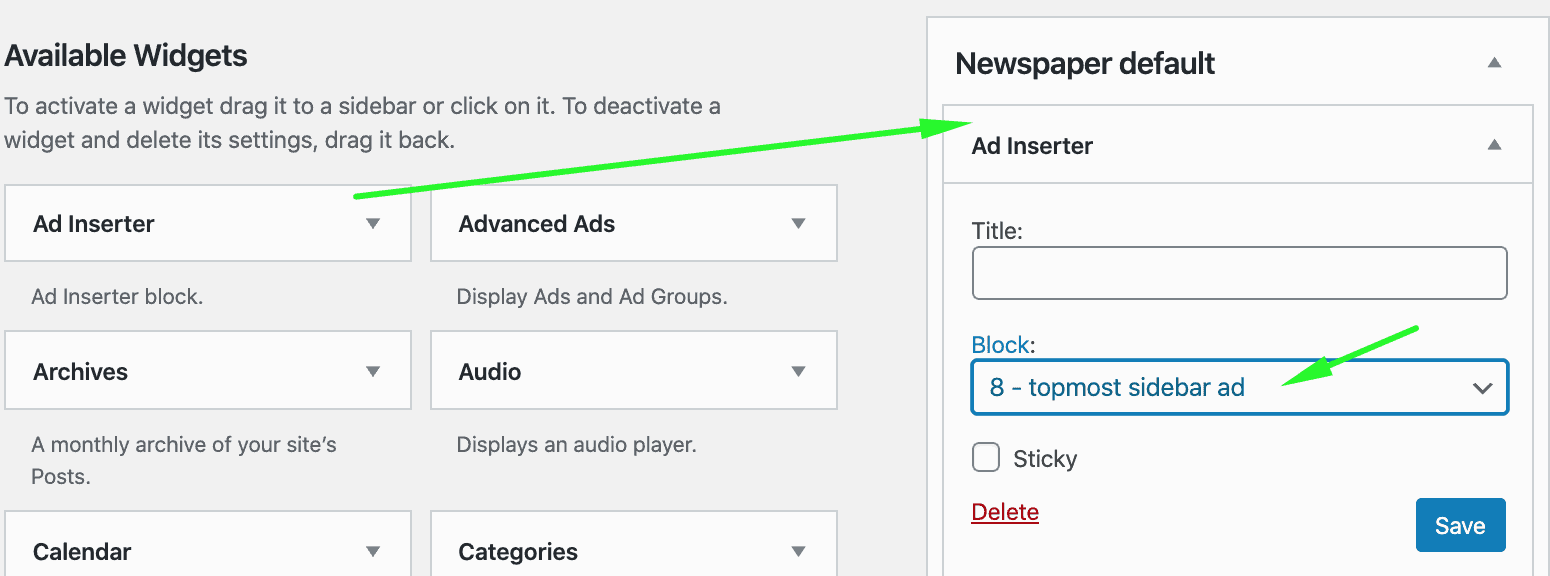
Test it!
- Download PubGuru Ad Inspector
- Open a page on your site where the ads are deployed
- Turn on PubGuru Ad Inspector and click Refresh page
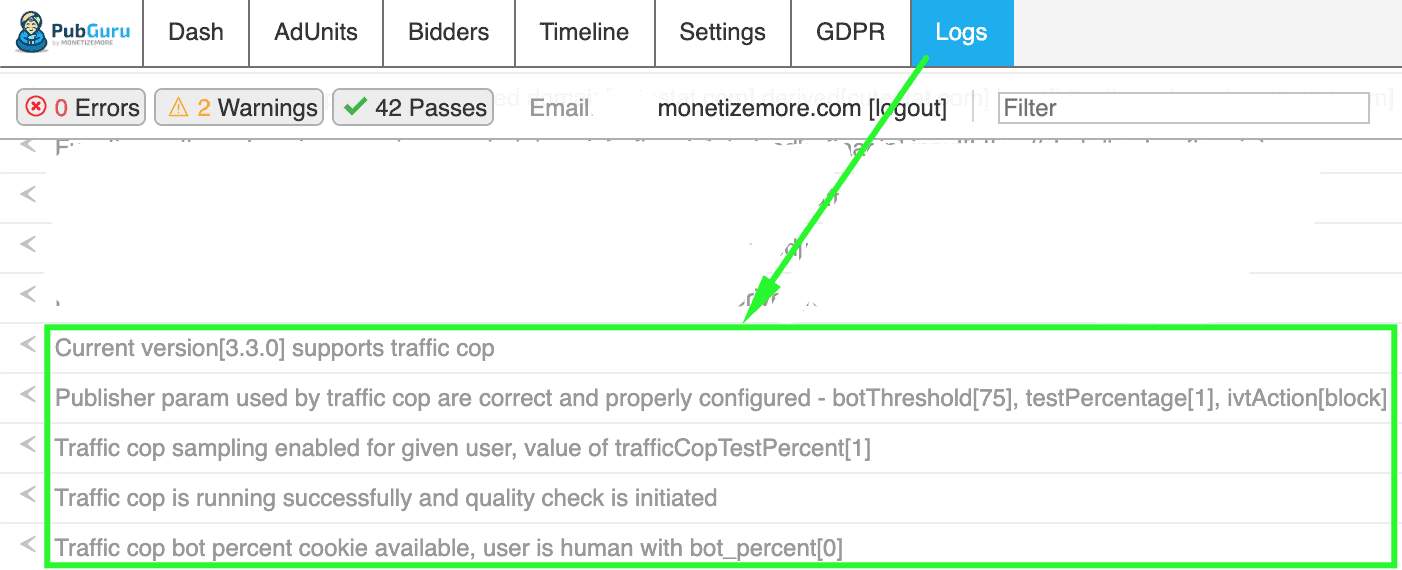
- Under the Logs tab, you will see the status of Traffic Cop
Google Analytics and GDPR Compliance
Traffic Cop seamlessly handles Google Analytics tracking and compliance with GDPR, with no extra codes needed! This makes implementation a lot simpler and unloads a bunch of codes from your site.
- Remove your Google Analytics tracking codes and any GDPR codes.
- Inform your MonetizeMore Account Manager if you plan to do this so you can agree on a specific schedule to deploy the changes.
- We’ll take care of everything else from here.
Checking Reports
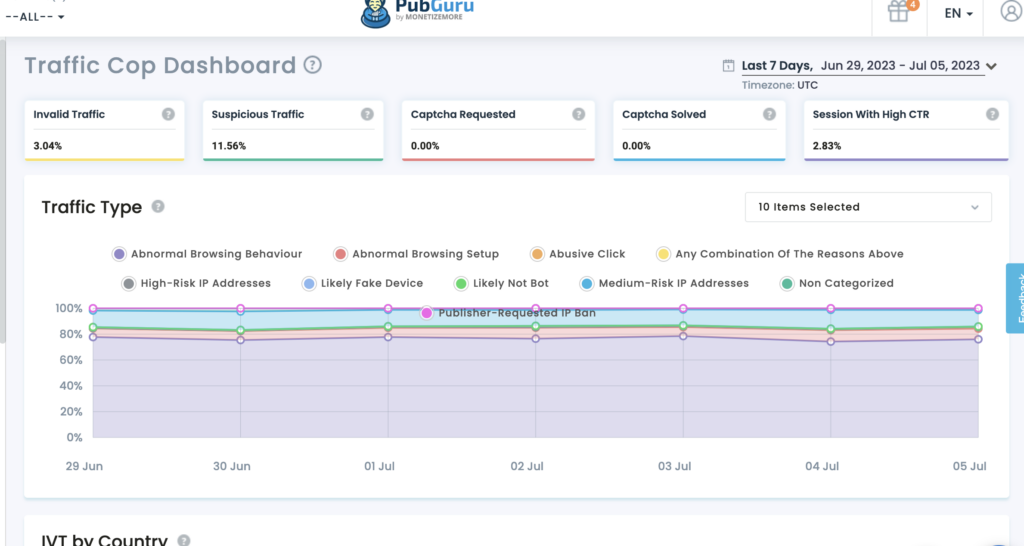
- You will receive email instructions to set up your account on https://app.pubguru.com/
- Watch this quick introduction video: https://youtu.be/I8Z1BK0vUDU
- Witness how Traffic Cop protects your earnings from fraud traffic!
You can check out the video tutorial here:
By implementing Traffic Cop, you can significantly reduce the risk of ad revenue loss due to invalid traffic. It provides a robust defense mechanism for your ad inventory, ensuring you maintain a high-quality traffic stream that advertisers can trust. With the right setup and maintenance, you can protect your ad business and ensure its growth and sustainability. Get started with Traffic Cop here!
source https://www.monetizemore.com/blog/how-to-block-ads-from-serving-to-invalid-traffic/


0 Comments